To minimise risk of damaging equipment or causing power surges it is advised to power up equipment in the following order:
- External Harddrives - Allowing 30 seconds to maintain normal power levels
- ProControl - then any Fader Packs or Edit Pack.
- MIDI interfaces and other MIDI devices.
- Audio Interfaces
- Mac computer
- Genelec monitor system
protools session
Firstly Load up AVID - Protools version 10.
Start a new session with the following settings for broadcast quality:
When the program is loaded up, the first thing to do is go to the top of the screen to the 'setup' menu and then select I/O (Input/Outputs) from the dropdown menu.
Start a new session with the following settings for broadcast quality:
- 16bit Audio
- 48k Sample Rate
- Wav File
- Either Stereo or 5.1
- Timecode needs to be set at 09.59 in the task bar and selecting Set Up.
- Pal needs to be selected
- LTC needs to be selected
- And Finally the Timecode rate needs to be set at 24 frames a second.
When the program is loaded up, the first thing to do is go to the top of the screen to the 'setup' menu and then select I/O (Input/Outputs) from the dropdown menu.

In this menu you can select where all the channel strips and buses are routed to. As you can see in the image above Bus 1-2 has been renamed to Out 1-2 and has been routed to the output 1-2 of Protools. Each bus can also be selected as stereo or mono (2-channel or 1-channel).
When exiting this menu by pressing the OK button you will be on the arrangement window view. Swap to the Mixer view and create new auxillary tracks by hitting the Command + Shift + N keys. Create the same amount of tracks in stereo and mono that were setup in the I/O menu earlier.
When exiting this menu by pressing the OK button you will be on the arrangement window view. Swap to the Mixer view and create new auxillary tracks by hitting the Command + Shift + N keys. Create the same amount of tracks in stereo and mono that were setup in the I/O menu earlier.

In the channel strip I/O dropdown menu select the relevant buses for the respective tracks as shown in the image above.
At this point add you will want to add audio tracks that will be used for each instrument in the session.
At this point add you will want to add audio tracks that will be used for each instrument in the session.

|
In this image to the left 5 audio tracks have been selected and all tracks have all been renamed in the white boxes at the base of each Audio strip. The strips can also be coloured as seen in the pop up box. This is good for grouping of channels. For example you may want to all the drums, such as a snare, kick, hats and percussion. These will all be sent to the group bus drums for common processing.
|
|
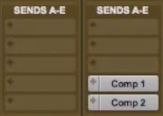
This section of the channel strip is used to select a bus where the strips sound is sent to. In this case the channel is being sent to a bus called "comp". The comp bus is an effects channel that has been setup with the compressor effect plug-in present. You can select what level in dB you want sent to that specific bus. This can be seen as a percentage of how much of the sound will be processed through this effect.
The entire session can be saved as a template in the file dropdown menu for use later with further sessions that want similar configurations. This speeds up the process of getting started using common parameters. a little bit of timecode.For importing of audio for a audio post production session it is important to ensure the correct setup of timecode.
The correct timecode would be 10:00:00:00 for the start of an audio post production project for television and 01:00:00:00 for feature film. channel strip breakdown |
|

|
Starting at the top of the channel strip:
INSERTS A-E: This is where effects and plug-ins are inserted to directly effect the audio within the channel SENDS A-E: This section enables the audio to be sent from the channel and effected by the location it is sent to |
|
I/O: Input/Output routing to buses and effects.
AUTO: Automation options (Latch, touch, read, write) GROUPING: Track grouping with others. PAN: Also known as 'Pan-Pot' due to analog desks potentiometers. Choose to pan the track left or right across a stereo field. The Pan is indicated in the bar below. RECORD: Record to the track. S: Solo the track. M: Mute the track. CHANNEL FADER: Control Output Volume next to the level meter visual indicator. VOLUME PEAK INDICTOR: Indicates if the channel is overloading/distorting. TRACK NAME: Name of the track |

|
